Step-by-Step SharePoint 2013 Installation Guide Part-3
After this series of post, you will have a good idea of
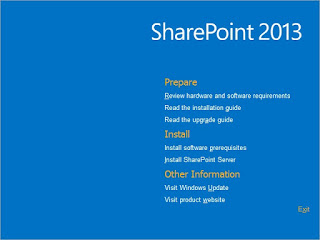
Insert the CD into virtual drive. Auto-run will start the welcome screen of SharePoint 2013. In the Install the software prerequisites.
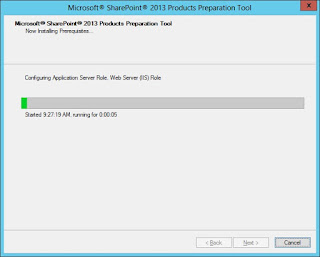
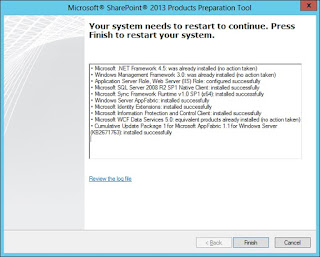
This wizard will download and install the prerequisites for SharePoint 2013. So, it will take some time and system will get restarted many times.
Note: You need internet connection to complete this step. So, if you are not connected with the net then, download it from here and install it manually. Once manual install complete run the install prerequisite. It'll check and confirm if all the prerequisite is installed completely.
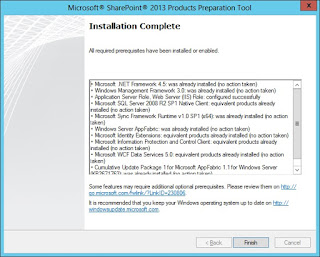
On completion, you will see Installation Complete window. List of components is displayed in the content region of this window.
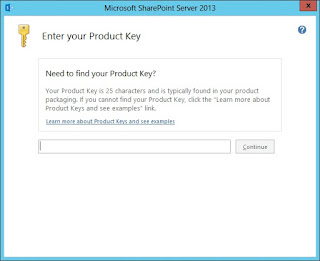
Now, Install SharePoint Server. Setup will extract files and prompt for the key. Provide the key and click continue.
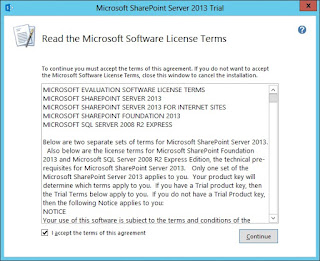
Accept the license agreement and click continue.
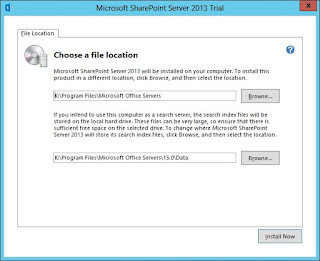
Choose the file location and start the installation.
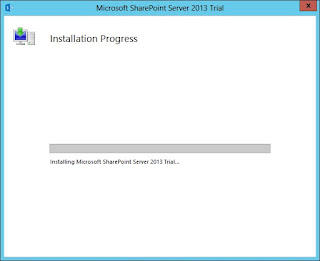
Installation progress window will appears.
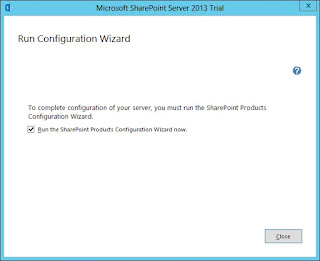
Once SharePoint server finish installation, this window will appear. Leave the checkbox checked and click close. It will close the setup wizard and opens the configuration wizard.
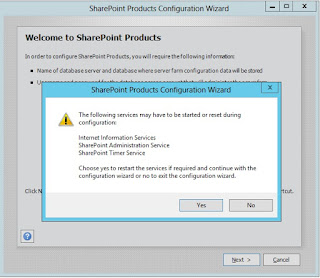
Welcome page of configuration wizard will displays the information about what is needed to complete this configuration. On clicking next, it will display a message dialog click yes.
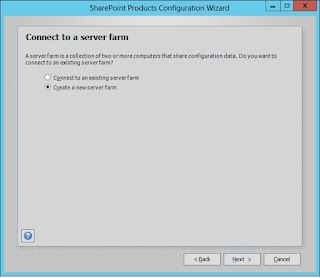
Select create new server farm and then click next.
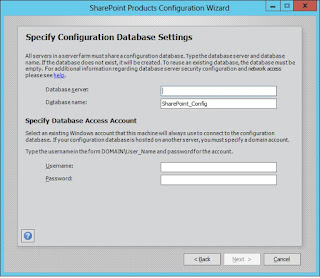
In this page, we have to provide database configuration settings, database server, database name and access account. Provide your database server name and leave the database name as it is. Now, in access account, provide the sqlaccess account that we have created in previous post and click next.
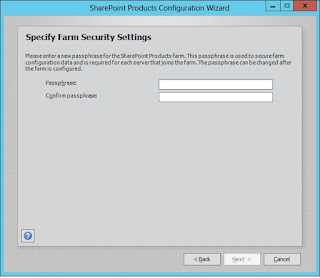
Provide the passphrase.
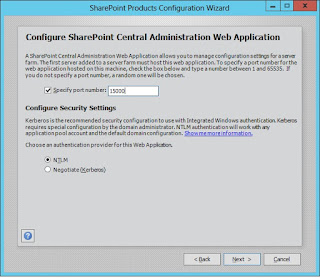
Wizard will generate random port number for Central Administration Site. So, if want to configure port number then check on Specify port number and provide your port number and click next.
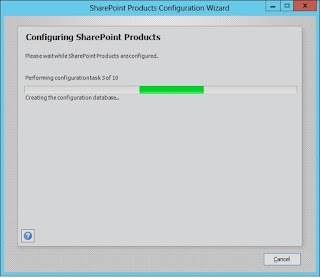
Wizard will start configuring SharePoint databases.
On completion, you will see Configuration Successful window.

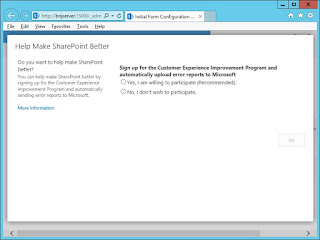
On clicking finish button, wizard will close and a browser window opens with Central Administration site. Select yes in customer experience and click OK.
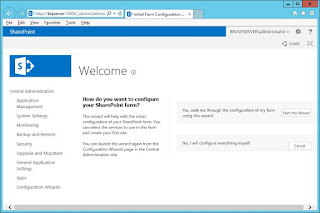
Now, you will see welcome page for central administration. You have a option to choose between manual configuration and automated configuration using wizard. You can do this configuration later from the Configuration Wizard link in Central Administration. I'm little bit lazy person, so I'll choose automated through wizard and clicked on Start the wizard.
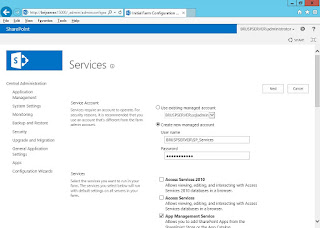
Wizard will opens a page for configuring Services. Provide the SP_Service account detail that we have created in first post. And select the services that you want to configure at this time. Remember you can configure other services later also. And the process will take time, as it'll create and configure databases for all the services that you have selected here. Once finished with the selection click next.
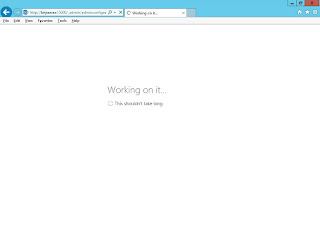
And it will display a Working on it page. Although is says "This shouldn't take long" but it does. So, don't worry take a rest, we are almost finished with the installation and configuration.
Once all the services are configured, it'll display completion page displaying all the services configured.
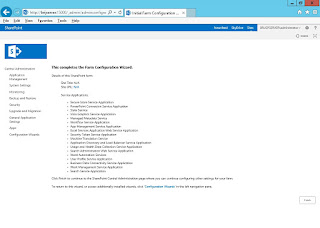
Installation and configuration part is completed. Now, start creating and configuring sites and see what's new in SharePoint 2013.
- Installation and configuration of Windows Server 2012
- Installation of SQL Server 2012 Express Edition.
- Installation and configuration of SharePoint 2013.
Insert the CD into virtual drive. Auto-run will start the welcome screen of SharePoint 2013. In the Install the software prerequisites.

This wizard will download and install the prerequisites for SharePoint 2013. So, it will take some time and system will get restarted many times.
Note: You need internet connection to complete this step. So, if you are not connected with the net then, download it from here and install it manually. Once manual install complete run the install prerequisite. It'll check and confirm if all the prerequisite is installed completely.


On completion, you will see Installation Complete window. List of components is displayed in the content region of this window.

Now, Install SharePoint Server. Setup will extract files and prompt for the key. Provide the key and click continue.

Accept the license agreement and click continue.

Choose the file location and start the installation.

Installation progress window will appears.

Once SharePoint server finish installation, this window will appear. Leave the checkbox checked and click close. It will close the setup wizard and opens the configuration wizard.

Welcome page of configuration wizard will displays the information about what is needed to complete this configuration. On clicking next, it will display a message dialog click yes.

Select create new server farm and then click next.

In this page, we have to provide database configuration settings, database server, database name and access account. Provide your database server name and leave the database name as it is. Now, in access account, provide the sqlaccess account that we have created in previous post and click next.

Provide the passphrase.

Wizard will generate random port number for Central Administration Site. So, if want to configure port number then check on Specify port number and provide your port number and click next.

Wizard will start configuring SharePoint databases.

On completion, you will see Configuration Successful window.

On clicking finish button, wizard will close and a browser window opens with Central Administration site. Select yes in customer experience and click OK.

Now, you will see welcome page for central administration. You have a option to choose between manual configuration and automated configuration using wizard. You can do this configuration later from the Configuration Wizard link in Central Administration. I'm little bit lazy person, so I'll choose automated through wizard and clicked on Start the wizard.

Wizard will opens a page for configuring Services. Provide the SP_Service account detail that we have created in first post. And select the services that you want to configure at this time. Remember you can configure other services later also. And the process will take time, as it'll create and configure databases for all the services that you have selected here. Once finished with the selection click next.

And it will display a Working on it page. Although is says "This shouldn't take long" but it does. So, don't worry take a rest, we are almost finished with the installation and configuration.

Once all the services are configured, it'll display completion page displaying all the services configured.

Installation and configuration part is completed. Now, start creating and configuring sites and see what's new in SharePoint 2013.


This comment has been removed by a blog administrator.
ReplyDeleteThis comment has been removed by a blog administrator.
ReplyDelete